
this holiday, my parents’ hosted the holidays at their house back in wisconsin, so I flew back from boston to stay in my old highschool home (holy #throwback). they recently did a complete remodel of their bathrooms, so naturally I took it upon myself to examine every little detail of those spaces because hey, I’m a residential designer and it’s part of my lifestyle. ¯\_(ツ)_/¯
anyways, during my inspection, I came across one glaring error that had been made during construction. something that was so huge I got out of the shower and ran downstairs in my towel to tell them about. an absolutely appalling oversight. something that…probably no one but someone in the construction or design industry would know or even remotely care about:
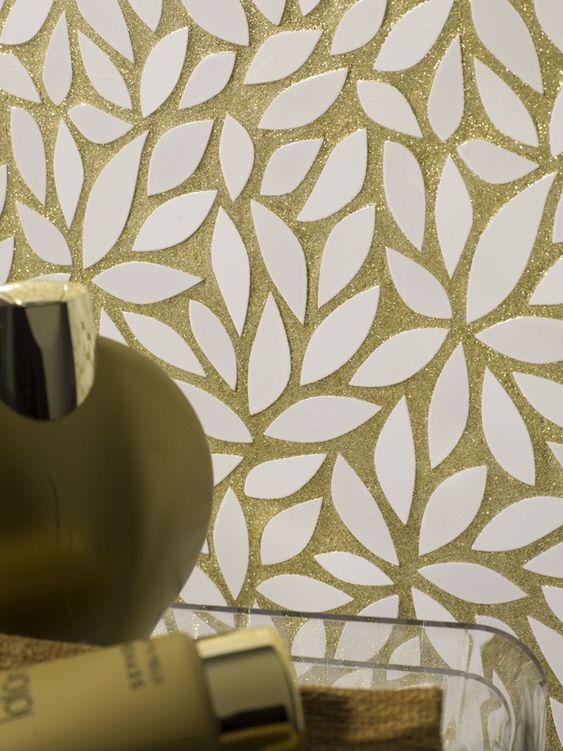
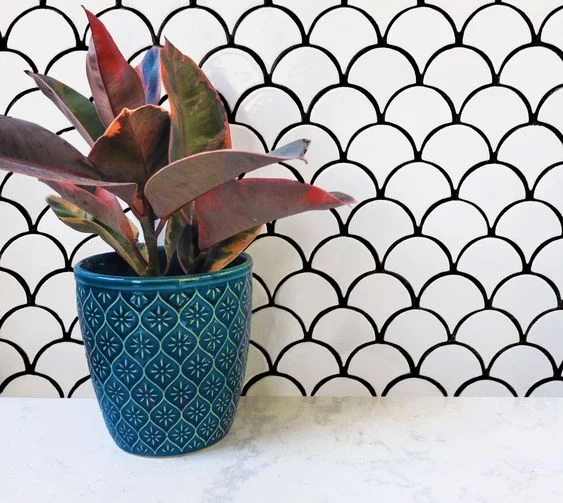
UNSANDED, UNSEALED GROUT ON AN ARTISAN GLASS WALL MOSAIC.

okay, so we all know about grout: that stuff that’s used between tiles to hold them in place. we know it can make a statement and totally impact the design of a room (I’m looking at you, white subways with black grout) but how much do we really know about grout, like why or how it’s used?
contrary to the belief of the majority of people I’ve worked on tile projects with, grout actually isn’t the material that’s holding your tile in place. to install tile, it’s first laid on a thinset or mortar layer to act as a “glue,” and grouted once dried.
this thinset / mortar is what’s adhering the tile and wall or floor (underlayment) together, but the grout is what is preventing the tiles from moving out of place, which can cause cracking, chipping and all sorts of expensive, pesky problems no one wants. grout also creates an impermeable layer between the edge of the tiles so bacteria, oils, and mildew can’t build up behind the underlayment of the tile. in short, grout is a waterproofing fail-safe.
like tile itself, there’s an extremely wide variety of grout available and it’s a make-it-or-break-it type of consideration that you need to ensure is chosen correctly.
unfortunately, it’s an extremely common occurrence for a contractor to frantically call with a grout disaster mid-installation. with adequate pre-planning, and then some checking, and then with a little more planning, you’ll have nothing to worry about. even if you’re having your tile professionally installed, I highly recommend going through the planning process yourself , as tiling can so often go wrong and it’s one of the priciest labor costs of a build or remodel. you don’t want to have to deal with redos which can be costly and stressful, and will hold your entire project up.
so, what kind of grout is right for you? (not just the most convenient for your contractor)
pro tip: don’t use one type of grout to save money in a room unless you’re using the same material throughout. a single room may require several different types, so make the investment prior to having to rip out tile that is ruined due to simple oversights!
before I go into why I was so appalled at the grout disaster in my parents’ home, let’s go over what the four main types of grout are:
sanded
sanded grouts are concrete based with large aggregate particles, and come in a powder that is mixed with water on site. these aggregate particles make the grout joints less prone to cracking as the aggregate acts as a bridge between tiles to keep shrinkage to a minimum. however, it’s also hard to use in small joint widths due to the large particles, so to use a sanded grout, your joints must be greater than 1/8”, but less than 3/8”. it is the second strongest of all grout types, cheapest, and therefore the most common. however, it is extremely porous, permeable and stainable, so it needs to have an additive sealant mixed in or be sealed post-installation. since it is the roughest all grouts, it also needs to be tested prior to installation on your material, especially if installing a soft stone or tile with a polished finish.
unsanded
unsanded grouts are essentially the same as concrete-based sanded grouts, less the addition of aggregate. it has a strong grip, but is more prone to shrinkage than sanded grouts due to the lack of aggregate retaining the joint spacing between tiles. without aggregate, it is much more pliable, easier to spread and thus used for thinner and more sculptural wall joints. it is also used when installing materials with delicate finishes that would otherwise be damaged by the aggregate in rough sanded grouts. though unsanded grouts are more prone to cracking and shrinkage than sanded grouts, it is an unlikely occurrence due to the minimal pressure applied to the vertical surfaces wall surfaces or ceilings it is most likely used on. like sanded grout, unsanded grout also requires a sealant as it is cementitious and also very permeable.
epoxy
epoxy grouts are made from a mixture of epoxies, resins, and powders that are highly resistant to cracking and are extremely tactile. they are highly impermeable, making them virtually maintenance-free. a delight of design favorite, epoxy grouts allow for the addition of extremely fine glass particles and colored pigments, making your grout dazzle. who knew those joints could be so glamorous? unfortunately, epoxy grouts are susceptible to staining, but can be removed with a standard acidic cleaner.
urethane
urethane grouts are a type of non-cementitious sanded grout with the same applications as the traditional cementitious sanded. however, unlike traditional sanded grouts, they come premixed with a resin and polymer base, as opposed to a water base. these resins and polymers in turn make them the strongest of all grouts, and the most durable against stains, cracks and chemicals. they can also be mixed with color pigments, and are uv resistant by nature so any color of urethane grout will never fade or become discolored. though they are premixed and marginally stronger than epoxy grouts, they do take significantly longer to dry before they can be exposed to water – up to 7 days.
as far as the ordeal in the bathroom at my parents’ house, whooo even cares? “is it really that big of a deal, mk, you ridiculous drama queen?” the answer is YES.
to recap:
-
their tile installer used sanded grout on an artisan glass wall tile
-
their tile installer used 1/8” grout joints with sanded grout
-
their tile installer or contractor didn’t seal anything
…and this is the perfect example of why, as a home owner, you cannot sit back and assume your contractor knows their stuff (sorry, mom & dad).
anyways, why does all this matter?
when the installer used a rough grout on such a delicate surface they caused the edges to chip and crack off. whilst wiping off the excess grout, the aggregate scratched up the glazed surface like crazy, removing the glaze and leaving behind a haze. since they used too small of a joint width for a sanded grout (1/8”), the resulting grout is bulky due to protruding aggregate, and is gradually causing more cracks in the delicate tile.
now, instead of a smooth, glazed surface, it is scratched, broken, and dull. to make matters worse, the grout wasn’t sealed either, so it’s been absorbing every drip of water that has ever touched it, sinking through to the underlayment. merely months old, this once beautiful, handmade tile now is ruined and has a fraction of the lifespan that it would’ve had the tile installer taken care to grout properly.
that is why it’s so imperative you choose both your grout and contractor properly!
determining the type of grout you need is primarily a process-of-elimination procedure, but there are a few standard “rules of thumb” you can use to make the process a little easier.
-
if this is a wall or ceiling tile and the longest edge is no longer than 9”, use a 1/16” or 1/8” grout joint – depending on the look you like, as well as how consistant the sizing will be. ensure the tile is sealed if need be, and use an unsanded or epoxy grout.
a 1/8” joint is generally used if the tile is hand-made, non-rectified (has uneven edges or rough/unfinished edges), or will have a variation in the z-axis (surface thickness). this thicker joint will account for the slope from tile to tile, ensuring maximum coverage.
-
glitter grout can be used on ceramic, porcelain and glass tiles, but should not be be used on polished stone. honed stone must be tested prior to installation.
-
when using an epoxy grout on a ceramic tile with a crackle glazed tile, ensure that the tile has been sealed before grouting.
-
before using an unsanded epoxy grout with additives (glitter grout) on a honed stone, absolutely ensure the tile has been sealed beforehand and test the grout on the stone prior to proceeding with the entire installation. these grouts can still be rough and harder than your stone and may end up scratching the sh!t out of your precious stone!
-
urethane grouts may take longer to cure, but will have a significantly longer lifespan, and will be more cost efficient in the long run. however, never use urethane on shower walls, as they cannot be used with joints that are larger than 1/8”.
-
glitter grout is amazing – but use it carefully. it won’t damage sealed/non-crackle ceramic, porcelain or glass, but can cause some serious damage to your stone. your best option? keep the glitter grout to your subway tiled walls.
-
a 1/4” joint is ansi standard for floor tiles – any joint larger will require a special type of sanded grout with “jumbo” aggregate.
hopefully that cleared up a bit of the confusion surrounding types of grouts and their uses, potentially saving you from a tile disaster!
before you see your contractor apply that sanded grout to your polished stone wall mosaic, stop. them. in. their. tracks. and call 911, or have them (or you) contact me (I love to hear from you!).
have you ever had an issue with tile installation, grout, or any of the related? have you found anything handy to know during the installation process?! sound off in the comments!
x – mk